Configure Dreamweaver to specify the location of site files. A website consists of a series of files that ultimately all reside in one folder. The folder on the local computer that contains all the files for a site is called the local root folder, and Dreamweaver must know its location to utilize site management capabilities. The local root folder can live anywhere on the workstation's hard drive. It is best to locate the local root folder on a local hard drive, although the local root folder can be on a mapped network drive but error messages will result when attempting to access the site files when the workstation is not connected to the local network. Never define the directory from which the pages are being actively served as the local root folder. try to select an appropriate location for the local root folder, to minimize the need to move it after it has been defined. If a new site is being generated, simply create an empty folder where the site files will eventually be stored.
Once the basic site definition has been established, new pages can be created and files from an existing site can be downloaded to the local root folder if working on an existing site.
Note: It is not recommended to define the Dreamweaver application folder as a site's local root folder, because it also contains all the files for the program itself. Only files that are related to a site should be in the folder, because the contents will eventually be uploaded to a server. Never save work in the Dreamweaver's application folder.
To establish a site in Dreamweaver, do the following:
1. Choose Window > Site Files (or press F5).
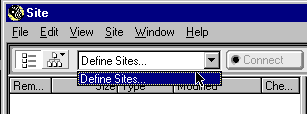
2. In the Site Window, select the pop-up menu next to the connect button. Choose the bottom option, Define Sites.
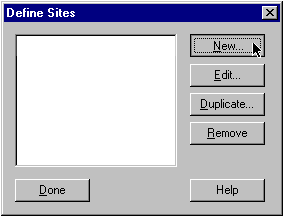
3. The Define Sites dialog box appears. Select the New button.
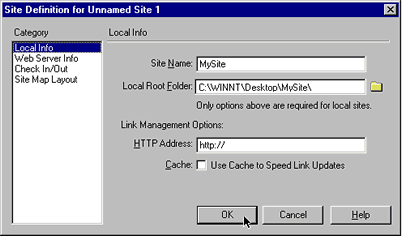
4. The Site Definition dialog box appears. Type the name of the site into the field next to Site Name. The name of the site is for organizational purposes only, and will not appear on any of the pages when previewed in a browser.

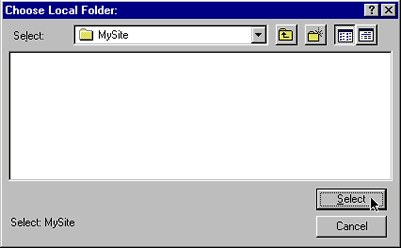
5. Next, select the file folder icon to the right of the field Local Root Folder. The Choose Local Folder dialog box appears. Navigate and select the folder that contains all the site files. After choosing the Select button, the dialog box closes.
6. In the Site Definition dialog box, a path now exists in the field next to Local Root Folder. This path is essential for Dreamweaver to maintain the site structure. If the location of the Local Root Folder changes, repeat step number 5.
7. Note: A copy of the contents of the local root folder will probably be transferred to a server so that others may view the Web pages once they have been completed. The next steps provide information for configuring the Web Server Information. It is not necessary to do so until files have been created and are ready for transfer. Steps 7, 8 and 9 may be skipped until files need to be uploaded.
Select the Web Server Info category. The Site Definition window changes to provide the choice of server access. Select Local/Network if the server lives on a local area network or FTP if the files will be transferred to a server that is not accessible via a network.
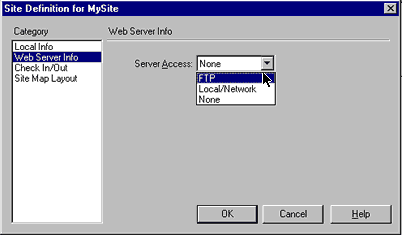
8. If the files will be copied to a Local/Network server, select the file folder icon to the right of the Remote Folder. Browse to select the folder on the server where the site files will be placed.
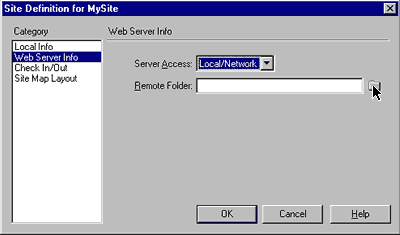
9.
If FTP access is desired, enter the server information into the appropriate fields in the Web Server info area. The specific information for these fields is unique to each server, and therefore must be obtained from the server administrator, which in many cases is an Internet Service Provider (ISP). The FTP Host refers to the FTP address or IP address that calls the server. The Host Directory specifies the exact folder on the server where the files will go. The Login refers to the user name or login for the service provider's account, and the password is self-explanatory.
The FTP Host, Login and Password fields are required. In some cases, a server may be configured to automatically route the user to the correct directory by default, and the Host Directory field may be left blank, otherwise, enter the path to the directory where the Web files will be stored.
If the local root folder and remote directory information are defined correctly when the files are selected and the Put button is clicked, the files will be transferred onto the server and the structure on the local machine and on the server will mirror each other automatically. This ensures that the links will work correctly.
Note: Dreamweaver transfers the files in binary mode. If the server requires a different transfer method, or if a proxy server is being employed, another FTP client such as WS FTP or Fetch may also be used to upload the files.
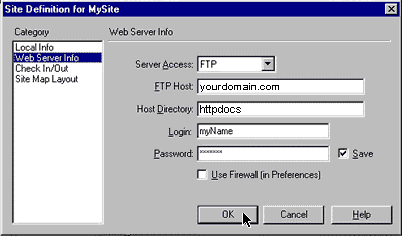
10. Select OK to close the Site Definition dialog box. Then choose Done to close the Define Sites dialog box.
Note: The other two categories, Check In/Out and Site Map Layout are optional. Specifying the information is not required when defining a site. If desired, the information can be accessed at a later time through the Define Sites dialog box.
11. The Site Window now displays the contents of the local root folder. The local root folder displays on the right side of the site window by default. The path to the local root folder will be visible at the top, if the folder contains any subfolders and files they will be listed below.

12. The site has now been defined. Existing files can be opened by either double clicking on the file name or icon in the Site Window, or by selecting File > Open.
13. Create new files by selecting File > New. It is important to save each HTML page right away because Dreamweaver cannot perform some functions on a page until it is saved. Therefore, immediately after creating a new document, it is suggested to save each file inside the Local Root Folder by choosing File > Save.


